Wednesday, April 24, 2024
Home Blog Page 2

Get the Most Out of Your Home with Impeccable Drawer Organization

0
drawer organization

Every home is equipped with a sacred junk drawer, but having more than one can create some anxiety, frustration, and a lot of unnecessary clutter. Effective drawer organization can help you take back control of every room in your home, from the kitchen to the bedroom. Drawer organization can boost functionality, improve aesthetics, and make finding what you’re looking for much easier. To help you get the most out of your home with drawer organization, we’ve put together a comprehensive guide with strategies for each room.

The Benefits of Drawer Organization

Every drawer in your home has the potential to help improve the organizational efficiency of a room. Whether you’re sorting through kitchen drawers, bathroom drawers, or drawers in your bedroom’s wardrobe, keeping them clean and organized will help you take back your space and reduce the frustration of digging through unnecessary junk. To help justify this tedious task, consider some of the biggest benefits of drawer organization.

1. Maximizing Space

One of the biggest advantages of drawer organization is the ability to take advantage of all the available space. When you haphazardly throw items into a drawer, you decrease the amount of usable space and create cluttered zones that can lead to drawer jams and forgotten items. Proper organization allows you to utilize every available inch of your space without having to go on a scavenger hunt to find things.

2. Easy Access

Finding and accessing things you need is also much easier with well-organized drawers. You won’t need to waste time rummaging through junk to find your spatula, a fresh pair of underwear, or your toothbrush (hopefully, all of which are in different drawers). Organization gives everything a place, which makes it easy to quickly locate and retrieve what you need.

3. Aesthetic Appeal

Drawer organization isn’t just about functionality; it also enhances the overall look and feel of your home. Well-organized drawers can help create a sense of order, which helps keep with the entire aesthetics of your home—even if you can’t see their contents at all times.

Drawer Organization Ideas for Each Room

The way you organize your kitchen drawers are going to be vastly different from how you organize your bathroom or bedroom doors. To help, consider some of the following drawer organization ideas for each room.

Kitchen Drawers

Your kitchen drawers are likely going to be the project that requires the most attention. With so many drawers and so many different items, things can quickly become a bit messy. This is especially true if you have several people in your family and no organizational system in place. Here are some tips for organizing your kitchen drawers.

  • Sort by Function

Start by categorizing your kitchen utensils and tools by function. For example, keep all your baking supplies together, separate your cooking utensils, and group your cutting tools. This ensures that you always know where to find what you need.

  • Use Drawer Dividers

Drawer dividers are your best friends in the kitchen. They help create separate compartments for different items, preventing them from getting jumbled together. Invest in adjustable dividers or drawer inserts to customize the layout to your specific needs.

  • Declutter Regularly

Regularly go through your kitchen drawers and remove any items you no longer use or need. You can donate these, throw them away, or try and sell them (depending on their value). This keeps your drawers from overcrowding and helps you maintain an organized space.

Bedroom Dresser Drawers

If you have a wardrobe or a dresser, you’ll want to make the most out of your bedroom drawers. Depending on their size, they’re great places to store socks, underwear, bras, workout clothes, and even shirts or sweaters. Here are a few tips to help you keep your bedroom drawers organized.

  • Fold and Stack

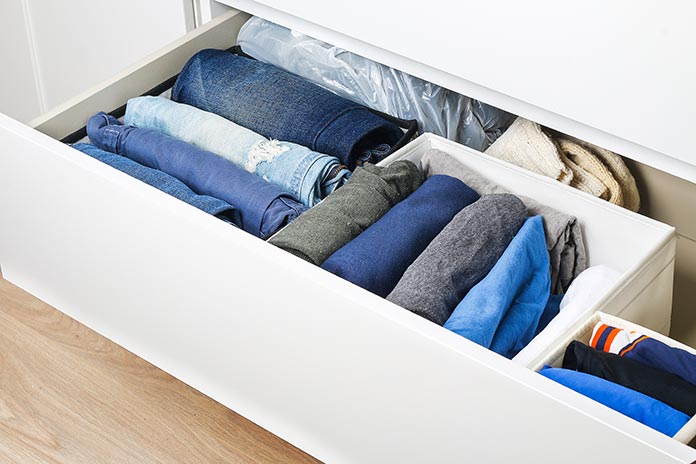
Instead of haphazardly tossing clothes into your dresser drawers, fold them neatly and stack them vertically. So, when you look down, you’ll see a small preview of each garment rather than whatever’s on top. This method maximizes space and allows you to see every item at a glance.

  • Use Drawer Dividers

Having one big drawer for socks and underwear or lingerie can lead to things quickly getting jumbled together. Instead, use drawer dividers to help keep things separate. There are customizable options available, or you can use drawer inserts to separate socks from underwear, scarves, and more.

  • Separate Accessories

Designate specific drawers for accessories like jewelry, scarves, and belts. Use small containers or trays within these drawers to keep everything organized and easily accessible.

Bathroom Drawers

Your bathrooms are one of the main areas where drawers can quickly become messy and cluttered. Consider some tips to help you keep your toiletries, beauty products, and other accessories in order.

  • Group by Category

Group similar items together in your bathroom vanity drawers. For example, keep all your skincare products in one drawer and your hair care items in another. This makes it easy to find what you need without rummaging through everything.

  • Use Drawer Organizers

Drawer organizers are essential in the bathroom. They come in various sizes and configurations, which makes separating your cosmetics, brushes, and other supplies simple. Similarly, you can purchase makeup organizers or inserts that help you keep hair accessories easy to see.

  • Label Containers

If you’re going to put any small containers in your bathroom drawers, take some extra time to label them. This is especially useful if you share your bathroom with others, as it prevents confusion and ensures that everything goes back in its place.

Office Desk Drawers

Finally, if you have an office in your home, you likely have a desk that’s filled with office supplies, papers, and more. To help you maximize your productivity and create a more pleasant working environment, consider some of the following tips on organizing your desk drawers.

  • Sort Paperwork

Keep important documents and paperwork neatly organized in designated folders or file organizers within your desk drawers. Regularly go through your files to eliminate unnecessary clutter.

  • Store Office Supplies

Use small containers or drawer dividers to store office supplies like pens, pencils, sticky notes, and paperclips. This prevents these items from cluttering your workspace and makes them readily accessible.

  • Declutter Electronics

If you have electronic gadgets and cables in your desk drawers, invest in cable organizers and small containers to prevent tangles and keep things functional, yet aesthetic.

Maintaining Impeccable Drawer Organization

Once you organize all of the drawers in your home, you’ll likely feel a huge sense of accomplishment and relief. The job is done, but if you want to maintain impeccable drawer organization, you’re going to need to stay proactive. To help keep things clean and clutter-free, try the following tips.

Regularly Review and Declutter

You might find that, after organizing a drawer, it’s not working as well as you’d hoped. If that happens, don’t worry. Review the drawer’s contents, declutter, and try a new system. While it might take some time, finding something that works will help you ensure it keeps working throughout the year.

Add Organization to Your Routine

Include drawer organization and decluttering in your regular cleaning routine. This gives you the opportunity to make small adjustments or put a few things back in their place without having to go through the entire ordeal again.

Involve the Family

After taking the time to organize the drawers in your home, let your family know. Tell everyone where items belong and encourage them to put things back where they found them.

Organizing all of the drawers in your home can help transform each room, but it might not give you all of the storage space you need. To help you maximize your living space and create a truly clutter-free home, consider renting out a self-storage unit from The Lock Up Self Storage. The Lock Up offers temperature-controlled self-storage units in various sizes to supplement your home storage. Our flexible leasing options allow for short-term rentals with the option to extend into long-term solutions. Plus, all our units are climate-controlled with stable humidity levels to keep your belongings in great condition, regardless of how long you need to keep them in storage. As an added bonus, our facilities are protected with top-of-the-line security features such as perimeter alarms, gated access codes, and 24/7 CCTV. For more information about our available self-storage units and sizing options, contact us at 1-866-327-LOCK or visit one of our locations for a tour.

12 Innovative Storage Ideas When You Have No Closet Space

0
storage ideas no closet space

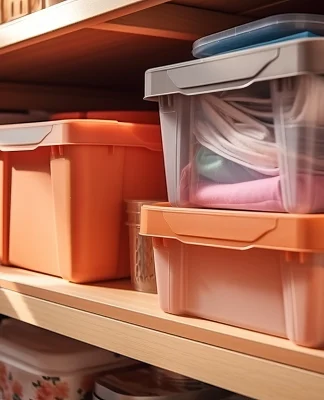
Not having enough closet space can be frustrating, especially when it comes to organizing your wardrobe and keeping your living areas clutter-free. Luckily, with a few innovative storage ideas, you can make the most out of each room. To help boost your creativity, consider some of the following storage ideas to try when you have no closet space.

1. Optimize Under-the-Bed Storage

The area under the bed is one of the most underutilized spaces in a bedroom. While you might throw a few things underneath to keep them out of the way, several strategic options exist to utilize this area for storage. One option is getting long, low containers that can be slid under the bed. You can store seasonal clothing, extra bedding, shoes, heavy sweaters, and more in these, but they might not be too convenient for clothes you need to access every day. There are also options for drawer systems that can be installed under the bed, which could be used to store socks, underwear, gym clothes, and pajamas.

Check the dimensions of the space under your bed and start playing around with some different ideas. If your bed is very low to the ground, consider getting raisers to help optimize storage space.

2. Maximize the Use of Vertical Space

Although not exactly the most innovative storage idea to compensate for a lack of closet space, vertical space should not be overlooked. You can install tall shelves in rooms, add wall-mounted cabinets, or strategically place a bookcase along a wall. Vertical storage is one of the most innovative storage ideas, as it doesn’t impact floor space.

3. Buy a Wardrobe Rack

Not having enough closet space in your bedroom can be frustrating, especially if you are a visual person when it’s time to choose your outfit in the morning. A great alternative to closet rods is a wardrobe rack. Wardrobe racks come in various sizes and styles, making them great for any bedroom. There are options to buy portable racks or ones that can be drilled directly into your bedroom wall to maximize floor space. This gives you plenty of room to hang your clothes neatly while providing the room with an open and modern feel. Some wardrobe racks may also include shelving spaces for additional storage.

4. Add Storage Benches for Shoes

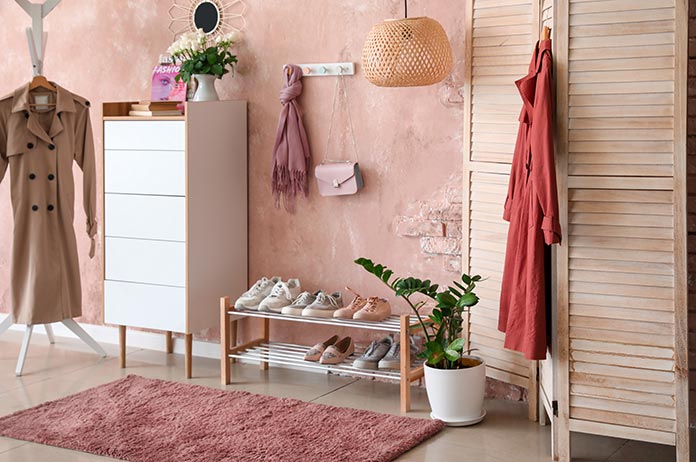
One of the most frustrating things to store in a home with limited closet space is shoes. Shoes can pile up and clog doorways or quickly take up all of your closet’s floor space. Consider adding a storage bench to help you keep your entryways and bedrooms clutter-free and organized. A storage bench gives you the perfect place to keep your shoes out of sight and the space to sit down and put them on when you’re heading out the door. You can get them in various sizes and place one in the foyer, mudroom, or even in the entry-wall hall. If you don’t have the space for an entire bench, consider placing some shoe racks there instead. This will at least help you store more shoes in less space, as the racks will maximize vertical storage.

5. Install Some Wall Hooks

Another innovative storage idea to help give you more storage space is the use of wall hooks. Wall hooks are super simple but very effective and can help free up space in any room. In your bedroom, you can use wall hooks to hang sweatshirts, bags, hats, scarves, and more. In your hallway, wall hooks can support your coats, outerwear, and bags. In the kitchen, wall hooks are great for towels and utensils. The versatility of wall hooks allows you to declutter without wasting valuable floor space.

6. Use Shelves Strategically

Shelves can be used to store almost anything and can be installed on almost any wall in your home. In your bedroom, install open shelves to display and organize your clothes, shoes, or decorative items. In the living room, floating shelves can hold books, photos, and collectibles. The key is to arrange shelves visually pleasingly while ensuring easy access to your stored items.

7. Repurpose an Antique Trunk

An old antique trunk can serve as a really beautiful decorative piece, but it also offers plenty of functionality. Old trunks have a ton of interior space that often gets forgotten in lieu of its aesthetics. If you have one, consider using it for storage. You can use the trunk to store whatever you like, from books and movies to blankets and pillows. Keep lesser-used items inside to free up space if it’s in your living room. If you have the space in your bedroom, consider putting the trunk at the foot of your bed and using it to store shoes, accessories, or bulky sweaters. The unique aesthetics and functionality blend make antique trunks an excellent choice for homes with limited closet space.

8. Get Creative with Your Bookcase

Traditionally, bookcases are purchased to store books and a few pieces of décor. However, bookcases are one of the most innovative storage ideas. You can add baskets, bins, and decorative boxes to store small items like craft supplies, movies, blankets, gaming systems, and more. If you have a bookcase in your room, these small bins or boxes can store accessories, t-shirts, sweaters, or anything else that can be folded and tucked away. Alternatively, you can use the bookcase as an open shelving concept and store foldable items out in the open.

9. Spread Things Out

You might not have a ton of closet space, but if you have an extra room that you’re not using, consider spreading things out. Or give your spare room a dual purpose. For example, if you have a designated room for a home office, but there’s a ton of empty space, consider adding a wardrobe or some open shelving to create an open-concept closet. A guest room’s closet can also store extra clothes or accessories without putting them out in the open. Be strategic with your space, and don’t be afraid to take advantage of all the rooms in your house.

10. Try a Capsule Wardrobe

A capsule wardrobe is a minimalist approach to clothing that allows you to create several different outfits with a few staple items. This includes choosing a color palette and then getting items that can easily mix and match to create several options out of fewer articles of clothes. While this isn’t exactly a storage idea, it will help you make the most out of your limited space and reduce the frustration of choosing your outfit on busy mornings.

11. Keep Seasonal Clothes in Storage

If you have limited closet space, don’t waste it with out-of-season clothes. Instead, consider storing seasonal clothes in a climate-controlled self-storage unit. This allows you to keep them in good condition without sacrificing precious storage space in your home. Just make sure that you prepare them before putting them in storage.

12. Find Furniture That Fits Your Space

There are some great options for furniture that doubles as storage, but you still need to be cognizant of each room’s floor space. Try to prioritize furniture that fits inside your home without cluttering a room. This is especially important if you’re going to purchase a wardrobe. Wardrobes can be huge, and if your bedroom doesn’t have the available space, it’s just going to cause frustration. Instead, opt for multifunctional furniture items with hidden compartments and moveable pieces to maximize both storage and functionality.

Lacking enough closet space can be frustrating, but with a few innovative storage ideas, you can reclaim your space and make the most out of each room. However, if you still need more storage or feel like your house is a bit too cluttered, rent a self-storage unit from The Lock Up Self Storage. The Lock Up offers temperature-controlled self-storage units in several sizes to help supplement your home storage and increase your livable space. All our units are climate-controlled with stable humidity levels to keep your belongings in excellent condition, regardless of how long you need to keep them in storage. Our facilities are also protected with top-of-the-line security features such as perimeter alarms, gated access codes, and 24/7 CCTV. For more information about our available self-storage units and sizing options, contact us at 1-866-327-LOCK or visit one of our locations for a tour.
11 Practical Tips for Living in a Studio Apartment

0
studio apartment

Embracing the allure of a studio apartment often means trading square footage for affordability and a sense of minimalism. While the cozy dimensions can seem challenging at first, plenty of tips for living in a studio apartment can help you make the most out of your space. Studio apartments provide a blank canvas for creative living arrangements and multifunctional spaces—you just need a little inspiration. Here, we’ll explore 11 invaluable tips for living in a studio apartment. You’ll find everything you need, from ideas on transformative furniture to unique, space-defining décor.

What Qualifies as a Studio Apartment?

Living in a studio apartment can be tough, but affordability makes them an attractive option. The biggest difference between a studio and a one-bedroom apartment is the smaller size and general layout. Studio apartments have about 300 to 400 square feet of floor space, while one-bedroom apartments have about 700 to 1,000 square feet. It’s a pretty substantial difference.

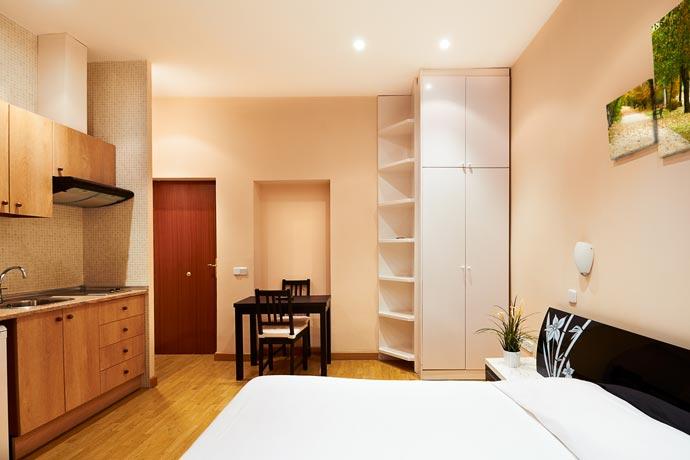
The layout of a studio apartment is also different. Studios tend to have one room with distinct “areas” within the same room. However, the bathroom is typically in a separate room that connects to the main one. Some studios also have a kitchen that connects to the primary room, while others have the kitchen in the same open space. Floor plans for studio apartments will vary, but the square footage remains roughly the same.

Why is Living in a Studio Challenging?

As you can imagine, the small square footage of a studio apartment can bring about several challenges. Primarily, some of the biggest challenges of living in a studio apartment include:

  • Lack of a large kitchen area for cooking and hosting
  • Limited space for friends and family
  • Lack of storage space and accessibility
  • Cramped living quarters
  • Inability to compartmentalize your days or activities

11 Tips for Living in a Studio Apartment Comfortably

Although there are some downsides, you can live in a studio apartment comfortably. You just have to be strategic and get a little creative with your space. To help, consider the following tips for living in a studio apartment.

1. Try to Separate the Bedroom Area

One great way to help compartmentalize your studio apartment is to try and divide the space so that you have a separate “bedroom” area. You won’t have too many options for arranging your bedroom, but you can try to create the illusion of a separate “room.” You can do this with shelving units, a bedroom divider, or even a curtain. While it might not be a wall, it still allows you to transition into your nighttime routine without feeling like you’re sleeping in your kitchen or living room every night.

2. Consider a Murphy Bed

If you really want to maximize your living space, consider purchasing a Murphy bed. A Murphy bed is a type of bed that can be folded up and away into the cabinet or wall. This means that every morning, you simply get up, make your bed, and tuck it away, opening up all the floor space that would otherwise be occupied.

3. Divide Space with Shelves

As mentioned, large shelving units can help you divide up the spaces in your room. You may want to do this for your bedroom or kitchen, depending on the layout of your apartment. The shelves give you plenty of extra storage space as an added bonus.

4. Appropriately Scale Furniture

When shopping for furniture, make sure you have the dimensions of your studio apartment on hand. You’ll need to purchase furniture (kitchen table, desk, bed, couch, coffee table, etc.) based on how big the space is. Luckily, several options for smaller items can fit inside a room while still offering a ton of functionality.

5. Invest in Flexible Furnishings

You can also purchase a few pieces of furniture that can be transformed for multiple uses. For example, there are options for a simple desk that can be expanded into a kitchen table for hosting a small dinner. Or, you may have a couch that can be folded out into a bed. Furniture that can be used for multiple things can help you use your studio apartment in unique ways. If you already have a lot of pieces from your previous place and you don’t want to get rid of them, it’s best to store your furniture offsite and purchase new items that will fit in your studio apartment.

6. Rent a Self-Storage Unit

One of the most important tips for living in a studio apartment is learning how to be strategic about your storage. However, even that’s not always enough. Therefore, to maximize your life in a studio apartment, rent a self-storage unit for excess belongings. This can help you maintain a clear living space without having to go through and donate or sell things you want to keep. There are several different options for sizing. Just make sure that you choose a climate-controlled self-storage unit for longevity.

7. Get Rid of Things You Don’t Use

Do you have buckets of crafting supplies that you never open? Sporting equipment that hasn’t been touched in years? Don’t bring it into your studio apartment. Either put it in a self-storage unit or donate it. You don’t need to keep things you don’t use in your limited space at home.

8. Declutter Your Kitchen

You might only have a few kitchen cupboards, which will need to hold everything from dishes and cutlery to dry food and non-perishables. Not only do you need to organize your kitchen cupboards like a pro, but you also need to reduce the amount of unnecessary items you have.

Go through your kitchen and pack away any items that you don’t use. Heavy-duty mixers have no place in a tiny studio apartment if you’re not regularly baking. Only keep your cabinets stocked with essentials, so you have more room for storage and places for your food! Keep everything else in a nearby self-storage unit for easy access.

9. Only Buy What You Need

Living in a studio apartment means you’ll have to adapt to a minimalist lifestyle, at least to some degree. While it might take some getting used to, it can save you tons of money and unnecessary stress in the long run. Try waiting a few days before making a purchase to see if you really need it or if it’s just something you want. The goal is to only buy what you need. Th

10. Downsize Your Wardrobe

Next, assess your wardrobe. Do you have a ton of clothes you don’t wear? Is your closet filled with out-of-season clothes? There are several options to help you make the most out of a small studio apartment, many of which don’t come equipped with closets. One option is to rotate your wardrobe with the seasons. This first requires a bit of closet decluttering, then sorting through winter, spring, summer, and fall clothes. You’ll want to store anything you won’t wear for the season somewhere out of sight so only the clothes you know you’ll wear are visible. You can also cut back on most of your items and create a minimalist capsule wardrobe. If you don’t want to get rid of any clothes, keep them in a self-storage unit. Just make sure you use the right types of storage containers.

11. Keep Things Clean

Finally, cleaning your studio apartment can help you maximize your living space and get more out of the room. Make your bed every morning, don’t let the dishes pile up, and try to put away your laundry as soon as possible. Doing this will make a world of difference.

Living in a studio apartment can be an exciting adventure, but that doesn’t mean you have to get rid of everything that doesn’t fit within the confines of its walls. Instead, rent a self-storage unit from The Lock Up Self Storage. Our temperature-controlled self-storage units can help you downsize without having to donate or throw away your beloved belongings. We offer a variety of self-storage units in varying sizes to meet your needs and help you enjoy your livable areas in a smaller space. With our flexible leasing options, you can test out a unit with short-term rentals and extend into long-term rentals as needed. All of our units are climate-controlled and offer stable humidity levels to ensure that all of your things stay in great condition. Our facilities are also protected with top-of-the-line security features like perimeter alarms, gated access codes, and 24/7 CCTV. To learn more about our self-storage units at The Lock Up, give us a call today at 1-866-327-LOCK or stop by one of our locations for a tour of the facility.

Self Storage in Chicago

0
low section man holding cardboard box his hand. Resolution and high quality beautiful photo

Abandond Storage Units Lead to Storage Wars

0
Line of storage rooms.

11 Things to Do Before Selling Your Home

0
Prepare home for sale.

Selling your home can be an exciting and challenging experience. While you may be eager to move on to your next adventure, it’s important to take the time to properly prepare your property for sale. By doing so, you can increase your chances of selling quickly and for the best possible price. From cleaning and decluttering to making repairs and staging your home, we aim to provide you with expert advice and tips to help you make your property as attractive as possible to potential buyers. So, whether you’re a first-time seller or a seasoned pro, consider the following tips on how you can prepare your home for a successful sale.

1. Declutter and Clean

Decluttering and cleaning your home before selling is essential for several reasons. For one, it helps create a positive first impression on potential buyers that allows them to see the full potential of each space. Without unnecessary knick-knacks, your home will appear more spacious and inviting, which can help buyers envision their future in each room.

Strategic decluttering and cleaning can also increase the value of your home. A well-maintained home will attract more buyers, which can potentially result in more competitive offers. Plus, doing these things early can make the moving process easier and less stressful. Aim to get rid of unnecessary items and organize your belongings early on, as doing so will ultimately simplify packing and transport, thus making moving day smoother and more efficient.

2. Vacuum, Sweep, and Mop

Once you’ve decluttered and cleaned, it’s time to move on to the floors. Take the time to vacuum, sweep, and mop each room depending on the type of flooring materials. If you have carpets that have seen better days, consider hiring a professional carpet cleaner or renting a device to do it yourself. Just make sure that if you choose to clean your carpets, you give them plenty of time to dry before hosting an open house.

3. Banish Bad Odors

Overpowering odors can be a major turnoff for potential buyers. Unpleasant smells can come from a variety of sources, such as pets, cooking, and unventilated basements. To get rid of bad odors, start by identifying the source of the smell and addressing it directly. This may involve deep cleaning carpets, upholstery, and curtains, as well as eliminating any sources of moisture that could be causing musty smells. In addition, you can use air purifiers, scented candles, and air fresheners to help mask any lingering odors. To help keep bad odors at bay, keep your home well-ventilated by opening windows and doors so fresh air can circulate.

4. Maximize Natural Light

Try to maximize the natural light in your home, as doing so can make your space feel more spacious, brighter, and welcoming. Even if you don’t get the best natural light in some rooms, a few tricks can help. Start by keeping your windows clean and free of any obstructions, such as heavy curtains or blinds. If you’re concerned about privacy, try using sheer curtains or blinds that can be easily adjusted to let in more light during showings. You can also try using mirrors strategically to reflect natural light into darker areas of your home. Light, neutral colors on walls and furniture can further enhance natural light sources.

5. Consider a Fresh Coat of Paint

A fresh coat of paint helps your home look more polished and well-maintained. However, it also neutralizes the space and makes it more appealing to a wider range of potential buyers. When choosing a paint color, opt for light grays, beiges, or whites. Neutral colors help create a clean, cohesive look and will help cover up any minor imperfections in the process.

6. Organize the Pantry and Cupboards

Organizing the kitchen pantry and cupboards can help appeal to buyers, as it allows them to envision how they’d use the space. Start by getting rid of any expired or unused items then consider packing away small kitchen appliances that you don’t use often. When arranging items, try to keep like items together and use clear containers or labels to help keep everything organized and easy to find. This is also quite aesthetically pleasing to buyers and can help paint your home in a positive light.

7. Organize Closets

Next, move on to the closets. Start by decluttering each closet and getting rid of any clothes or accessories that you no longer need or use. This will not only make it easier to organize your remaining items but will also help to create a more streamlined look for buyers who want to see every inch of your home. You may also want to consider a capsule wardrobe to help maximize closet organization both now and in the future.

8. Make Minor Repairs

Minor repairs can go a long way when selling your home. Start by inspecting each room for any small repairs that need to be made, such as fixing leaky faucets, replacing burnt-out light bulbs, or repairing minor damage to walls or floors. Make sure that all doors and windows open and close smoothly and that all locks and latches are in good working order. If there are any larger repairs that need to be made, such as fixing the roof or repairing a broken appliance, consider whether it makes sense to make these repairs before putting your home on the market.

9. Spruce Up the Garage

Cleaning and organizing your garage are other important steps when selling your home, as doing so can help create a positive first impression with potential buyers and increase your home’s overall value. Start by taking everything out of the garage so you can power wash the floors and clean off any scuffmarks. While doing this, try to declutter and get rid of anything that’s either broken or rarely used. With everything out of the area, consider installing a few easy DIY organization tools, such as shelving units, pegboards, or tool chests, to help maximize your storage space and keep items easily accessible. Once you’ve cleaned everything and decluttered, be strategic about how you put things back.

10. Stage Your Home

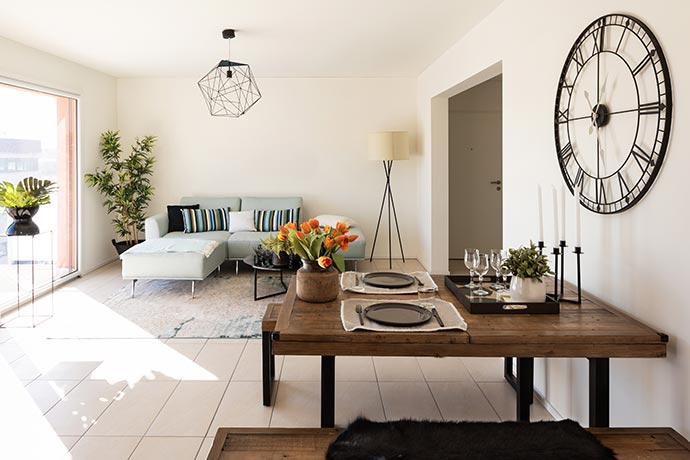
The goal of staging a home is to showcase your property’s best features and create an appealing and inviting environment that allows buyers to imagine themselves living there. To do this, you’ll want to declutter, deep clean, depersonalize, and rearrange furniture to create an open and spacious feel. Staging may also involve adding decorative items, such as artwork and plants, to create a cohesive and stylish look.

Staging can be done by a professional home stager or by the homeowner themselves, and it has been shown to increase the likelihood of a home selling quickly and for a higher price.

11. Enhance the Curb Appeal

One of the simplest and most effective ways to improve curb appeal is to keep the lawn and landscaping well-maintained. This should include regularly mowing the lawn, trimming bushes and trees, and removing any dead or overgrown vegetation. Adding colorful plants and flowers to the landscaping can also provide a pop of color and create a welcoming feel. You can also improve curb appeal with a fresh coat of paint or updated light fixtures. Making additional changes such as updating the mailbox, adding a new front door, or installing window boxes can also go a long way in enhancing the overall look of your home’s exterior.

If you’re selling your home and aren’t sure if everything will fit in your new house or apartment, a self-storage unit is a great alternative to selling things too soon. The Lock Up Self Storage offers temperature controlled self-storage units to help you during your move. We have a variety of self-storage units in varying sizes to meet your needs and help you enjoy space regardless of its size. With our flexible leasing options, you can test out a unit with short-term rentals and extend into long-term rentals as needed. All our units are temperature controlled and offer stable levels of humidity to ensure that all your things stay in great condition. Our facilities are protected with top-of-the-line security features like perimeter alarms, gated access codes, and 24/7 CCTV. To learn more about our self-storage units at The Lock Up, give us a call today at 1-866-327-LOCK or stop by one of our locations for a tour of the facility.

Using Self-Storage to Get the Most Out of Your Summer

winter clothes storage during summer

As summer approaches, many of us have already started to think about vacations, barbecues, and days spent outdoors. However, with all the excitement and fun that comes with the season, it’s easy to overlook the clutter and storage issues that can arise. This is where self-storage comes in. Whether you need a place to store your seasonal clothing and accessories, outdoor gear and equipment, or college dorm items during the summer break, self-storage can help you make the most of the season by providing you with a safe and organized space for your belongings. Here, we’ll explore the benefits of using self-storage during the summer months, offer tips for choosing the right unit and packing your items, and highlight some of the most popular items people store during this time of year.

6 Benefits of Using Self-Storage During the Summer

Summer is a great time to get outside, enjoy the weather, and have some fun. However, many people don’t realize how much a self-storage unit can help maximize your summer experience. While the obvious benefit to offsite storage is having a place to keep all your bulky winter accessories or equipment, they can be used for several other purposes. Some of the benefits of using self-storage during the summer include:

1. Store Outdoor Gear and Equipment

With the warmer weather and longer days, people tend to take advantage of outdoor activities such as hiking, swimming, and camping. However, these activities often require equipment and gear that can take up valuable space in your home, even when they’re stored outdoors. Self-storage provides a convenient and secure option to store your seasonal items, such as kayaks, camping gear, and sports equipment, so that you can easily access them when needed without cluttering up your living space.

2. Keep Seasonal Items Safe and Organized

Self-storage can also be a suitable place to keep your winter items, such as snowboards and skis, during the summer months. This not only frees up space in your home but also ensures that your gear is well-maintained and ready for the next winter season.

3. Create More Space in Your Home or Apartment

With self-storage, you can declutter your living space and stay organized. In addition to keeping bulky items out of your home, you can also pack up your clothes and put away seasonal accessories. This gives you more space in closets, bedrooms, and living areas. Just make sure that you properly store different types of clothing to ensure they stay in good condition throughout the season.

4. Keep Your Items Safe During a Move

Self-storage can also be an incredibly useful tool during a move, whether you’re downsizing, relocating, or simply need temporary storage. You can store items that you don’t need immediately but may want to keep for the future. Or you can keep your belongings safe during a transition period between homes. If you’re moving to a smaller place, self-storage can also help with downsizing.

5. Store College Dorm Items

Offsite storage is beneficial for college students during the summer months. Most students vacate their dorms or apartments during the summer break, which means they need a place to store their belongings until the next semester begins. Self-storage units provide a secure, convenient, and affordable solution for storing items like bedding, furniture, textbooks, and electronics. Additionally, students can use self-storage to store their items if they are studying abroad or interning in another city or state.

6. Keep Your Belongings Safe During Summer Travels

Finally, self-storage options are a great way to keep your items safe during long-term summer travels. This is especially beneficial if you plan to rent out your home while you’re gone or go on a vacation in between moves. Just make sure you know what can and can’t be stored before you move any valuables.

Tips for Using Self-Storage During the Summer

Self-storage can be a great solution for storing your belongings during the summer months, whether you’re moving, traveling, or just decluttering your home. To get the most out of your storage facility, consider some of the following tips.

Choose the Right Size Unit

Before renting anything, make sure you choose the right size self-storage unit for your needs. A unit that’s too small won’t fit all your belongings, while a unit that’s too large will cost you more money than you need to spend. Consider what you’ll want to store for the summer and visit a self-storage facility near you to get a better understanding of sizes.

Consider Climate-Controlled Units for Sensitive Items

If you’re storing items that are sensitive to temperature and humidity, like electronics, antiques, or photographs, always rent a climate-controlled unit. This will help protect your items from damage caused by extreme temperatures, especially during hot summer months.

Pack Items Properly to Prevent Damage

When packing your items for storage, use proper packing materials, like bubble wrap and packing paper, to prevent damage. Also, avoid packing items too tightly, as this can lead to damage or breakage. Different materials tend to require different storage containers or protection, so do your research accordingly.

Label Boxes and Keep Inventory

To make it easier to find what you need in your self-storage unit label all boxes and keep an inventory of the items you’ve stored. This will save you time and frustration when you need to retrieve something. If you’ll be storing summer items like kayaks or beach gear, keep these things towards the front of your unit for easy access.

Use Shelving or Pallets to Keep Items off the Ground

Finally, to protect your belongings from moisture and pests, use shelving or pallets to keep everything directly off the ground. This allows for airflow and will also make it easier to access things you need without having to move other boxes out of the way. Summer is also a great time to clean out your storage unit and organize it for optimal use throughout the year.

Popular Items to Store in Self-Storage During the Summer

During summer months, you can store whatever you need in your self-storage unit as long as you follow your facilities guidelines. Some of the most popular items put into summer self-storage include:

  • Seasonal clothing
  • Heavy coats
  • Boots
  • Seasonal accessories
  • Holiday décor
  • College dorm furniture
  • Business inventory and supplies
  • Snow blowers
  • Shovels and sleds
  • Winter equipment
  • Golf clubs
  • Surfboards
  • Kayaks
  • Large sporting equipment

You can use your self-storage unit in whatever capacity you need to help you make the most out of your summer holiday.

Choosing the Right Self-Storage Facility

Regardless of why you want to utilize summer self-storage, choosing the right facility can make or break your experience. For one, you’ll want to find a facility that helps maximize the safety and security of your belongings. A good self-storage facility will offer a secure environment with features such as CCTV cameras, proper lighting, and secure locks to protect your items from theft, vandalism, and natural disasters.

You’ll want to ensure that your facility makes it easy to access your items whenever you need them. Choosing a facility with good customer service will make the process of storing your belongings stress-free. Flexible rental terms are also ideal, as they provide you with the opportunity to adjust sizes or terms as the seasons change. Finally, always choose a facility that offers climate-controlled self-storage units, especially when you’ll be putting your items away during the hottest and most humid months of the year.

To help ensure that your items stay in excellent condition during the summer or throughout any season of the year, opt for climate-controlled self-storage units from The Lock Up Self Storage. At The Lock Up, we have all the amenities you’d expect in a premium self-storage facility. Plus, since all our units are climate controlled, you can rest assured that your belongings are in good hands and safe from harm. We also offer flexible leasing options, so you can alternate between sizes if your storage needs change. To give you even more peace of mind, our locations are equipped with top-of-the-line security features including security-controlled gate access, motion-sensitive lighting, 24-hour camera monitoring, and perimeter alarms. Many of our locations also offer electronic coded access specific to each tenant. To find a self-storage unit, visit our locations page or call 1-866-327-LOCK to speak to a representative today!

A Step-by-Step Guide to Staging Your Home

Young colleagues designers working together on a creative project and color samples for selection, Color swatch samples, Brainstorming Planning Partnership, creative graphic design working desktop.

When selling your home, one of the most important steps is making it look its best for buyers. While a deep clean is non-negotiable, staging your home correctly can make a huge difference in the perceived value and appeal to potential buyers. Unfortunately, there can be a lot of conflicting information on what to do or not to do when it comes to home staging. To help you make the most out of your home-selling experience, here’s a step-by-step guide to staging your home.

Some Important Information About Home Staging

Staging your home is pretty straightforward. The goal is to bring out the best features of each room without overcrowding it. It’s a way of marketing your home to potential buyers and helping them envision themselves living there in the future. Home staging is done to help expedite the selling process and increase overall property value. It’s an art and a science that tries to get buyers to develop an emotional attachment to your home so they begin to visualize their life unfolding in each room. If you’re not able to stage the entire home, the living room, master bedroom, and kitchen are the best rooms to focus on. Everything from décor, paint color, smell, and furniture goes into home staging, making it a fairly meticulous task. However, the effort is well worth it, as 82% of buyers find it easier to visualize a property as their future home when it’s staged.

Staging Your Home: A Comprehensive Guide

Although you can stage your home on your own, some people prefer working with a professional to get the most out of their efforts. If you’d prefer to DIY, here’s a step-by-step home staging guide.

1. Declutter Your Home

The first step in staging your home is going through every room and decluttering as much as possible. You want to remove any knick-knacks or unnecessary “stuff” filling your shelves, tables, and furniture. Clutter tends to distract the eyes of your buyer, and it will be the first thing they see when they walk into a room. This takes away from the room’s allure and will waste the rest of your staging efforts. Minimalism during staging is preferred, so unless there’s a distinct purpose for an item, pack it away in a box, label it, and put it in your self-storage unit.

2. Remove All Personal Items

When you’re decluttering, don’t forget to remove any and all personal items. This includes things with your family’s name on it, pictures of your family, or anything that may resemble a family heirloom. Potential buyers have a more difficult time envisioning their life in a home if they’re constantly reminded of the current resident. You can replace pictures on the wall with people-less art or scenery, but photographs should be packed safely away. If you want to keep them out until your home sells, put them in a small basket under a blanket or in a closet so you can easily put them back out once the buyers have toured your space.

3. Perform a Deep Clean

Once you’ve packed all the extra clutter and personal items, go through your home and do a thorough deep clean. This should include any hard-to-reach areas, underneath furniture, and all the nooks and crannies of cabinets, appliances, and closets. Clean homes maintain the allure of more valuable homes, so it’s worth the added effort.

4. Make Minor Repairs

You might come across a few scratches on the wall or broken nails when cleaning. Make a list of these so that you can go back and repair them before you show your home. If you notice any major repairs that need attention, it might be worth scheduling an inspection and determining the cost of fixing them. Although you won’t necessarily need to fix everything, a few things can drastically affect property value.

5. Boost Your Kitchen Aesthetics

The kitchen is the heart of your home, so it’s worth taking a little extra time to ensure it looks its best. Although you should still declutter and clean the pantry, cabinets, countertops, and refrigerator, you may also benefit from giving your kitchen a small facelift. This could include repainting the kitchen cabinets, adding new handles, or upgrading the appliances.

6. Add Extra Storage

One of the first things potential buyers look for in a new home is storage. Unfortunately, storage options aren’t always the best, especially in smaller homes. But when you show them various options for keeping their things safe and out of the way, you can draw their attention away from the fact that you only have one closet downstairs. Just don’t go overboard here; you don’t want them to think you need hundreds of bins or baskets to keep things organized within your home.

7. Consider Light Reflecting Colors

If you have a lot of scuffs or scratches on the walls, adding a fresh coat of paint may be worth your time. This small act can make a huge difference in the look and feel of a room, which, in turn, affects overall property value. Try to stick to whites, neutral colors, or natural hues to create a space appealing to various buyers. Light reflective colors are best for opening a room and creating a more welcoming environment.

8. Renovate the Bathroom

Another area of the house that you may want to consider renovating is the bathroom. Doing so gives buyers the impression that your entire home has been renovated and updated over the years. You can utilize small renovations such as upgrading the toilet, shower, or sink as long as it helps boost the modern feel of the space.

9. Try New Layouts

Next, start to rearrange the furniture in each of your rooms. Try new layouts, experiment with different focal points, and see what looks best. You might be surprised that your living room feels three times bigger when the couch faces a different direction. Or you may realize that your bedroom is more easily navigable when a large dresser is removed and replaced with a small vanity table. Do some research, move things around, and see what looks best for each room.

10. Add Some Accessories

Once you’ve got all of the furniture in place, go back and focus on the details. You don’t want to reintroduce a bunch of clutter into the room, but a few key accessories can make a world of difference. Add a colorful throw blanket to the back of a couch, a functional lamp near a reading chair, or even a stylish rug underneath the kitchen table.

11. Use Real Plants

Another great way to accessorize is to add real plants to each room. This creates a very comfortable environment that can be alluring to many prospective buyers. However, if you’re not able to care for the plants in the process of selling your home, it’s best to forego them altogether.

12. Extend the Staging to Your Yard

Finally, before you can say that you’ve finished staging your home, don’t forget to head outside and touch up the front yard and the backyard. You don’t need to hire landscapers to completely renovate your yard, but things should be pruned, cleaned, and well-maintained. A fresh coat of paint on the front door, a few flowers, and a clean walkway are easy ways to boost your curb appeal. If you have a backyard, make it look cozy and welcoming to give potential buyers a glimpse into what they could experience when they move in.

Staging your home is one of the best ways to sell it for its highest value, but that doesn’t mean you need to throw all your belongings away in the process. Instead, utilize a climate-controlled self-storage unit from The Lock Up Self Storage. We offer a variety of self-storage units in varying sizes to help keep your belongings safe, accessible, and in good condition while you’re staging your home, moving, or simply if you need more room. With flexible leasing options, you can use our self-storage for as long as you need, whether short-term or long-term. Our facilities have top-of-the-line security features like perimeter alarms, gated access codes, and 24/7 CCTV. To learn more about our self-storage units at The Lock Up, give us a call today at 1-866-327-LOCK or stop by one of our locations for a tour of the facility.

Valuable Secrets About Storing Wine

home wine storage

Properly storing wine is crucial for anyone—whether you’re a casual drinker or a committed connoisseur. How you store your wine impacts its longevity and flavor and helps you tap into the potential under the cork. Therefore, if you have at least a few bottles of unopened wine sitting on your counter or in your pantry, it’s worth learning some of the valuable secrets of storing wine.

10 Key Tips for Storing Wine

Unless you only buy a bottle of wine when you’re about to drink it, you have a lot to benefit from learning how to properly store wine. With that being said, there’s only a small percentage of fine wines that should be stored long-term for aging purposes. In these cases, bottles of wine can reach six figures, and you’d be better off going with a professional wine cellar for safekeeping. Here, we’re going to focus more on general storage tips for wine enjoyed shortly after its release.

1. Evaluate Each Bottle of Wine

Before storing any bottle of wine, try to assess each bottle’s quality and aging potential. Not all wines need to be professionally stored, especially if you plan to drink them within the next few months. Still, you can evaluate each bottle by taking note of the vintage, grape variety, and producer recommendations to determine the best approach. Fine wines with significant aging potential will benefit the most from proper storage conditions, as they will enhance the wine’s complexity and character over time. On the other hand, wines intended for immediate consumption might not require meticulous storage.

2. Choose an Optimal Temperature

The ideal temperature for wine storage ranges between 45 to 65 degrees Fahrenheit. Finding the right temperature within this range is important to preserve the wine’s flavors, aromas, and overall quality. Try not to go above 65 degrees, as higher temperatures can accelerate aging, leading to premature oxidation and loss of freshness. Lower temperatures can hinder the wine’s development and mute its flavors. Aim for a temperature that suits the specific type of wine you’re storing—55 degrees Fahrenheit is usually the best option for most grapes.

3. Keep the Temperature Stable

Maintaining a stable temperature is another key part of wine storage. Sudden fluctuations can harm the wine’s structure and overall quality. Rapid temperature changes may also cause the wine to expand and contract, potentially damaging the cork and allowing oxygen to seep into the bottle. To ensure stability, store wine in a location shielded from external temperature variations, such as a cool basement or a dedicated wine refrigerator.

4. Move Wine Away from the Kitchen

The kitchen is not ideal for storing wine due to frequent temperature changes and high heat generated by cooking appliances. Additionally, the strong smells that are usually present in a kitchen or pantry can also cause issues with wine storage. Instead, move wine storage away from the kitchen unless you have a dedicated wine cooler sealed off.

5. Store Wine in the Dark

Sunlight and UV rays can cause premature aging and degradation of quality, so it’s best to store wine in a cool, dark area. Exposure to light can lead to the formation of unpleasant aromas and the breakdown of complex compounds, resulting in a diminished drinking experience. If you don’t have a dark area to store your wine, use wine storage solutions that block UV light. When you’re ready to enjoy a bottle, avoid displaying them in direct sunlight or under bright artificial light for extended periods before drinking.

6. Avoid the Refrigerator

While short-term refrigeration is acceptable for white and sparkling wines, long-term storage in a traditional refrigerator is not recommended. Regular refrigerators are too cold and dry for proper wine storage, which can lead to flavor and aroma loss. They may also be filled with other foods with potent or overtaking aromas. Instead, invest in a wine refrigerator or a temperature-controlled storage unit designed specifically for wines.

7. Consider Humidity Control

Maintaining the right humidity level is another crucial element when preserving wine quality. Low humidity can cause the cork to shrink, leading to air exposure and oxidation. On the other hand, high humidity can promote mold growth, which can taint the wine. Aim for a humidity range of 60% to 70% for optimal storage conditions.

8. Store Bottles Horizontally

Storing wine bottles horizontally is widely recommended to keep the cork moist and ensure a proper seal. This position helps prevent air from entering the bottle, minimizing the risk of oxidation. Additionally, horizontal storage allows any sediment in the wine to settle at the bottom, facilitating a clearer pour. What’s more, horizontal storage allows you to maximize the efficiency of your space while you grow your collection.

9. Try to Avoid Excessive Movement

Constant movement or vibrations can disturb aging and negatively impact wine quality. Minimize handling and avoid storing wine in areas prone to frequent vibrations, such as near washing machines, in the refrigerator, or heavily trafficked areas. Choose a stable and quiet location for wine storage, minimizing any disturbances that could agitate the wine or disturb the sediment.

10. Know the Expiration Dates

Contrary to what you might think, many wines, especially those meant for immediate consumption, have expiration dates. Whenever you purchase a new bottle, take note of the recommended drinking window. Not all wines are meant to age; sometimes, excessive aging can lead to the wine’s decline in quality. While proper storage can slow the aging process, it’s important to consume wines within optimal drinking periods to enjoy them at their best. Keep track of the expiration dates to ensure you savor the wine when it’s at its peak.

Choosing the Best Place for Wine Storage

Trying to find the perfect place to store wine in your home can seem impossible, but there are a few options. Whether you want to buy an external cooler, transform your basement, or opt for professional storage, each option has its own advantages and disadvantages.

External Wine Coolers or Refrigerators

One option for wine storage is to invest in an external wine cooler or refrigerator that you can keep in your house. These appliances are designed to maintain the ideal temperature and humidity levels for storing wine. They provide a controlled environment that helps preserve the flavor and quality of the wine. Additionally, external coolers are compact and can be placed in various locations in your home, such as the kitchen or dining area, making it convenient to access your wine collection. However, they have limited capacity and may not be suitable for large wine collections. It’s also important to consider the cooler’s energy consumption and noise levels.

Basement or Wine Cellar

Transforming your basement into a wine cellar is another option for wine storage. Basements tend to have naturally cooler and more stable temperatures, favorable for wine preservation. With proper insulation, humidity control, and the addition of racks or shelving, you can create a suitable wine storage environment. However, basement wine cellars require careful planning and investment in climate control systems to maintain ideal conditions.

Professional Wine Cellar or Storage

For wine enthusiasts who seek optimal conditions and maximum security for their collections, professional wine cellars or storage facilities are an excellent choice. They’re specifically designed for wine storage, offering precise temperature and humidity control to ensure the wine’s longevity. Professional storage facilities often provide individual cellars with various size options, allowing you to choose according to your collection’s needs.

If you’re looking for the perfect place to store your wine, head over to The Lock Up Self Storage. Whether you’re a wine collector, investor, or restaurateur, The Lock Up Wine Cellars will help enhance and safeguard your investment. We’ve spared no expense to ensure that your collection is stored in optimal conditions—at an average temperature of 55 degrees Fahrenheit and 60% to 70% humidity year-round. We offer various sizes of cellars for your storage needs, so you only pay for what you need. To give you the peace of mind you need, our wine cellars are equipped with top-of-the-line security monitoring, including security-controlled gate access, motion-sensitive lighting, 24-hour camera monitoring, and perimeter alarms. We also offer traditional self-storage units with flexible leasing options. Many of our locations offer electronic coded access specific to each tenant. To learn more about the pricing, or to find a storage unit near you, call us at 1-866-327-LOCK today!

Self Storage 101

0

StorefrontAre you in the market for a self storage unit but don’t know where to start? Well, you’re in the right place. Whether you’re planning on downsizing, or perhaps starting a new business and need to store overstock, The Lock Up Self Storage has locations nationwide and knowledgeable staff at the ready to help guide you through this new endeavor. In this post we will answer commonly asked questions and demystify the whole process.

The first thing you’ll want to assess is how much storage space you’re going to need. We have a handy guide on our website that shows what can fit into each of the different sizes of self storage units. You can find it here. Simply click on the tab on the right called “Storage Unit Size Guide”. Keep in mind that it’s often beneficial to secure a unit that is a little larger than what you think you need.

With The Lock Up, you don’t need to worry about safety or security. All of our locations feature security monitoring and electronic key card access. Both you and your property are safe with us. Also, you don’t need to worry about how long you’ll need your self storage space because The Lock Up offers flexible month to month storage leases. But keep in mind that we often offer specials that are location specific. Which leads to the next point…

You’ll want to find a self storage location near you. Luckily, all Lock Up locations are in easily accessible areas near main thoroughfares. Visit www.thelockup.com to search through our locations for the one nearest you. In fact, if you aren’t able to visit the location in person to secure a lease, you can actually choose the size unit you want and sign up for a lease right online! We make it as easy as possible for you.
When choosing your unit, think about if you’ll need drive up access. We do offer units that you can drive right up to which is handy if you have large, heavy items. But keep in mind that not all drive up units are climate controlled. If you have items that are sensitive to temperature fluctuations or humidity levels, you’ll want to be sure to get a climate controlled unit.

When moving into your unit, The Lock Up offers a free move in truck for all new leases. This is yet another way that we go the extra mile for you. Plus, all of our locations have handcarts available in the loading bays for your use so that you don’t have to lug boxes one by one to your unit.
And once you’ve secured your self storage unit, be sure to get our Lock Up app that will help you keep all your Lock Up self storage units’ information handy and organized. It even allows you to quickly and easily pay your bill.

If you still have questions on how to get started, and want to talk to someone, feel free to call us at 877-618-8880. We are always happy to help!

POPULAR POSTS

MY FAVORITES